


Price: $8.99
(as of Apr 07, 2025 05:03:59 UTC - Details)
The Best Way to Apply Press-On Nails: A Comprehensive Guide
Introduction
If you’re looking to elevate your nail game without the hassle of salon visits, press-on nails are your best friend. They come in a variety of styles, colors, and lengths, making it easy to switch up your look in no time. In this article, we’re going to explore the best way to apply press-on nails, ensuring you achieve a flawless finish that lasts. We’ll cover everything from preparation to removal, using essential keywords and long-tail phrases to guide you through the process.
Whether you’re a beginner or someone who’s dabbled in press-on nails before, you’ll find practical tips and tricks to make your nail application a breeze. Let’s dive into the best methods and techniques for applying press-on nails like a pro!
Understanding the Benefits of Press-On Nails
Why Choose Press-On Nails?
Press-on nails are a fantastic choice for anyone looking for a quick and stylish manicure. They offer a range of benefits, including affordability, ease of application, and versatility. Unlike traditional acrylic or gel nails, press-ons require minimal effort and can be applied in the comfort of your home. Plus, they come in pre-designed styles that can suit any occasion.
Long-Lasting Wear
One of the biggest advantages of press-on nails is their potential for long-lasting wear. When applied correctly, they can last for weeks without chipping or lifting. This means you can enjoy beautiful nails without the constant upkeep that comes with other nail options.
Preparing Your Nails for Application
Nail Preparation Tips
Before applying press-on nails, proper preparation is key. Start by cleaning your natural nails thoroughly. Use a gentle nail polish remover to eliminate any oils or residues. Following that, trim and file your nails to your desired shape. This will help create a smooth surface for the press-ons to adhere to.
Cuticle Care
Don’t forget about your cuticles! Gently push back your cuticles using a cuticle pusher or a wooden stick. This not only enhances the appearance of your nails but also ensures that the press-ons sit flush against your natural nail. A neat cuticle area can significantly improve the overall look of your manicure.
The Best Way to Apply Press-On Nails
Step-by-Step Application Guide
Now that your nails are prepped, it’s time to apply the press-on nails. Here’s a step-by-step guide to ensure a flawless application:
-
Choose the Right Size: Select the press-on nails that fit your natural nails best. Most kits come with various sizes, so mix and match to find your perfect fit.
-
Use Nail Glue or Adhesive Tabs: Depending on the type of press-ons you have, you can use either nail glue or adhesive tabs. Nail glue provides a stronger hold, while adhesive tabs are less permanent and easier to remove.
-
Apply the Press-On Nails: Start from your pinky and work your way to your thumb. Apply the glue or tab to your natural nail, then press the press-on down firmly for about 10-15 seconds to ensure a strong bond.
- Shape and Buff (Optional): If you want to customize the length or shape, you can file the press-ons after application. Buffing the surface can also help the nails blend better with your natural ones.
Tips for a Flawless Finish
To achieve the best look, avoid touching your nails for a few hours after application. This will allow the adhesive to set properly. Additionally, using a top coat can enhance shine and longevity, giving your nails that salon-fresh finish.
Caring for Your Press-On Nails
Maintenance Tips
Once your press-on nails are applied, proper care can extend their lifespan. Avoid using your nails as tools, and try to keep them dry when washing your hands. Moisture can weaken the adhesive bond, leading to premature lifting.
When to Replace
Keep an eye on your nails for any signs of damage or lifting. If you notice any press-ons starting to lift or chip, it’s best to replace them. Regular maintenance and timely replacements will keep your nails looking fabulous.
Removing Press-On Nails Safely
How to Remove Press-On Nails
When it’s time to take off your press-on nails, do so carefully to avoid damaging your natural nails. Here’s how to remove them safely:
-
Soak in Warm Water: Fill a bowl with warm, soapy water and soak your fingers for about 10-15 minutes. This will help loosen the adhesive.
-
Gently Pry Off: Using a wooden stick or a nail file, gently pry the edges of the press-on nails. Start from the sides and work your way to the center.
- Use Nail Polish Remover (if needed): If any adhesive remains, use a gentle nail polish remover to dissolve it.
Post-Removal Care
After removing your press-on nails, take care of your natural nails. Moisturize your nails and cuticles with oil or lotion to keep them healthy and hydrated.
Conclusion
In conclusion, applying press-on nails is a simple and effective way to achieve beautiful nails without the fuss of traditional manicures. By following the best practices outlined in this guide, including proper preparation, application, maintenance, and removal, you can enjoy stunning nails that last. Embrace the convenience and style of press-on nails, and you’ll never look back!
Remember, the best way to apply press-on nails is with care and attention to detail. Happy nail decorating!
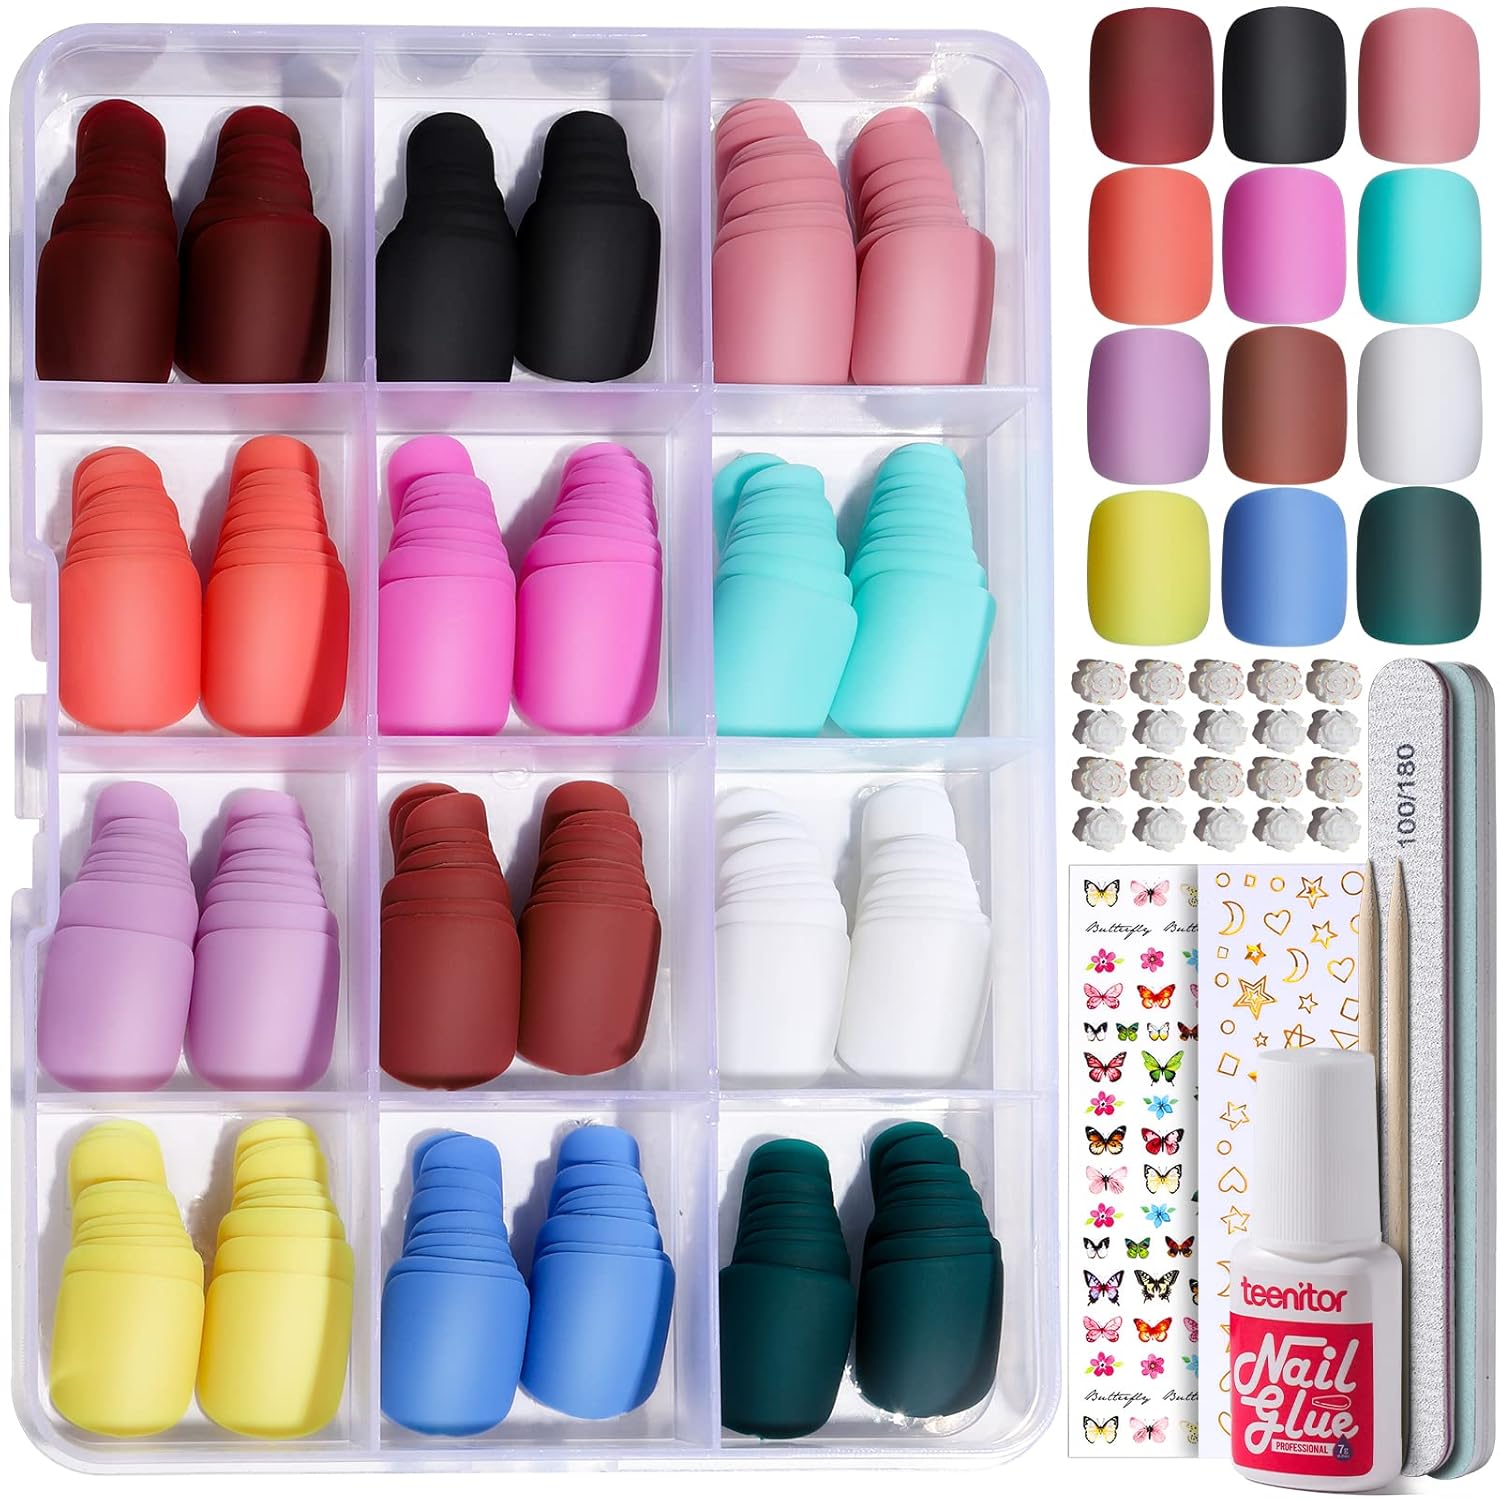
SHORT SQUARE PRESS ON NAILS SET - You'll have everything you need to create a flawless, professional-looking manicure in the comfort of your own home with our easy-to-use short fake nails. Come with 288pcs short square press on nails, brush on nail glue, nail file, nail buffer, nail cuticle sticks, 2 sheets nail art stickers, 20pcs flower nail charms.
VARIETY SIZES AND COLORS SHORT FAKE NAILS - With 12 sizes short square press on nails to fit your nails, you are guaranteed to find the perfect size for your nails, no matter how big or small they may be. 12 colors available, from classic nudes to trendy pastels and bold brights, which allows you to choose according to their preferences and occasions.
PREMIUM QUALITY MATERIALS SHORT PRESS ON NAILS - Teenitor short matte nails are made from the finest materials, ensuring a long-lasting, sturdy finish. You can trust that our Short Square Press on Nails will stay in place and look great for weeks on end. Reusable and easy to remove, they're a guilt-free way to keep your nails looking amazing.
NATURAL AND COMFORTABLE FIT SHORT MATTE NAILS - Teenitor short matte press on nails are designed to fit securely and comfortably, with a natural-looking curve that complements your nail bed. No more worrying about nails popping off or feeling uncomfortable. Short square-shaped tips perfectly mimic the natural shape of your nails, providing a seamless and elegant finish.
EASY TO APPLY SHOT GLUE ON NAILS - With Teenitor simple glue-on application, you can have salon-quality nails in just minutes without any fuss. No more waiting for polish to dry or dealing with chips and smudges. Short Square Press on Nails are the perfect solution for busy women who still want to look their best. Teenitor brush on nail glue dries very fast and doesn’t require a UV light.